포켓배틀스 MEV(from PKS) 받기 (3) - 현금화하기
이번 포스팅은 '포켓배틀스' 에서 받은 PKS 를 현금화하는 방법에 대해 알아보려 한다.
참고로 하단은 현금화하기 전에 던 관련 포스팅이다.
[App Tech/P2E] - 포켓배틀스 MEV(from PKS) 받기 (2) - 메타마스크 연동 및 KYC 인증하기
[App Tech/P2E] - 포켓배틀스 MEV(from PKS) 받기 (1) - PKS 받기
MEV 현금화 과정 요약
MEV 출금 후 현금화 하기 위해 하단과 같은 단계로 진행할 것이다.
1. PKS -> MPL
2. MPL -> MEV
2.1 MEV 수수료 준비하기
2.2 수수료로 준비한 MEV 를 메타마스크로 보내기
3. MEXC 거래소에서 MEV 입금주소 생성
4. 메타마스크에서 MEXC 거래소로 보내기
5. MEXC 에서 MEV 매도하여 현금화
PKS -> MPL
하단과 같이 게임에서 PKS 를 MPL(예전에는 PKT 였음) 로 교환하자.
◼ 설정 -> 계정 -> 교환


MPL -> MEV
하단과 같이 출금 사이트로 접속하여 MPL 을 MEV 로 스왑하자.
(스왑하는 과정에서 MEV 수수료가 필요하다.)
◼ 출금 사이트 접속 및 지갑연동
- https://www.meversedex.io/imo


◼ MEV 로 스왑
- MPL 을 MEV 로 스왑 시 MEV 수수료가 있어야 한다.
- 수수료 구매는 하단 MEV 수수료 준비하기 참조하자.


MEV 수수료 준비하기
MPL 을 MEV 로 스왑 시 필요한 MEV 수수료를 위해 MEXC 거래소(빗썸도 가능) 에서 MEV 를 매수하자.
(이미 수수료가 있는 분들은 요건 패스하자.)


수수료로 준비한 MEV 를 메타마스크로 보내기
하단과 같이 수수료용으로 매수한 MEV 를 메타마스크로 보내자.
(이미 수수료가 있는 분들은 요건 패스하자.)
◼ 메타마스크 주소 복사

◼ MEV 를 메타마스크로 출금
(MEV 를 보낼 때 주소는 메타마스크에서 복사한 주소를 붙여 넣자.)


◼ 메타마스크에서 확인

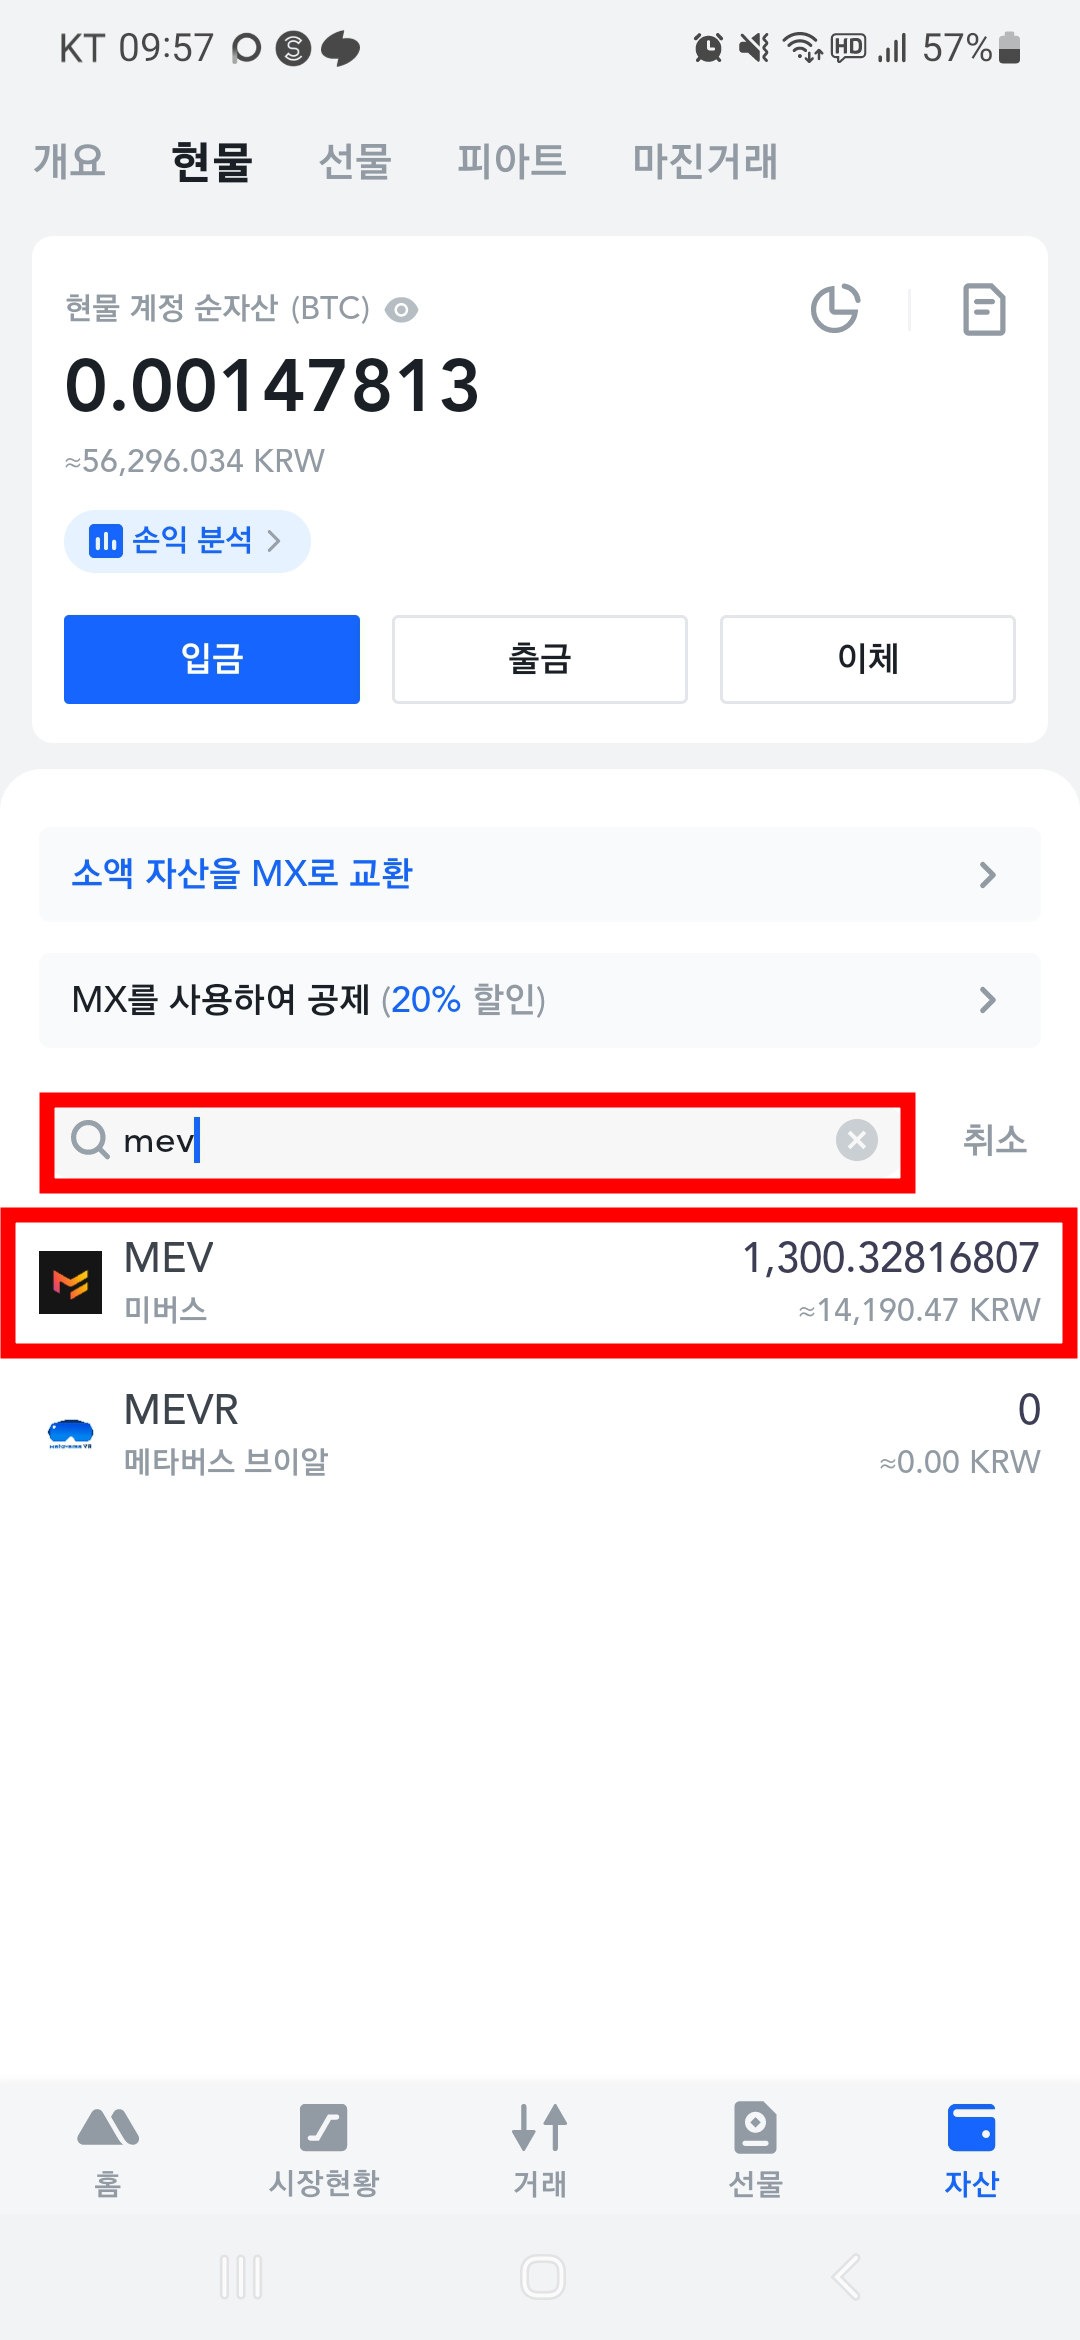
MEXC 거래소에서 MEV 입금주소 생성
지금까지 과정을 잘 따라왔다면 (PKS -> MPL -> MEV) MEV 가 메타마스크에 나올 것이다.
이제 MEV 를 보낼 거래소(MEXC)의 MEV 입금 주소를 생성한다.
◼ 메타마스크에서 MEV 확인

◼ 입금주소 생성


◼ 입금주소 복사

메타마스크에서 MEXC 거래소로 보내기
하단과 같이 MEV 를 거래소(MEXC)로 보내자.
이제 거래소(MEXC)에 도착한 MEV 를 국내거래소로 옮겨 현금화 하면 된다.
(해당 과정의 설명은 생략한다.)
◼ MEV 를 거래소(MEXC)로 보내기
- "To:"에 위에서 복사한 MEV 입금 주소를 붙여 넣기 한다.


◼ 거래소(MEXC) 에서 MEV 를 확인한다.